Design + DIY

Weekend Project: DIY Throw Pillows

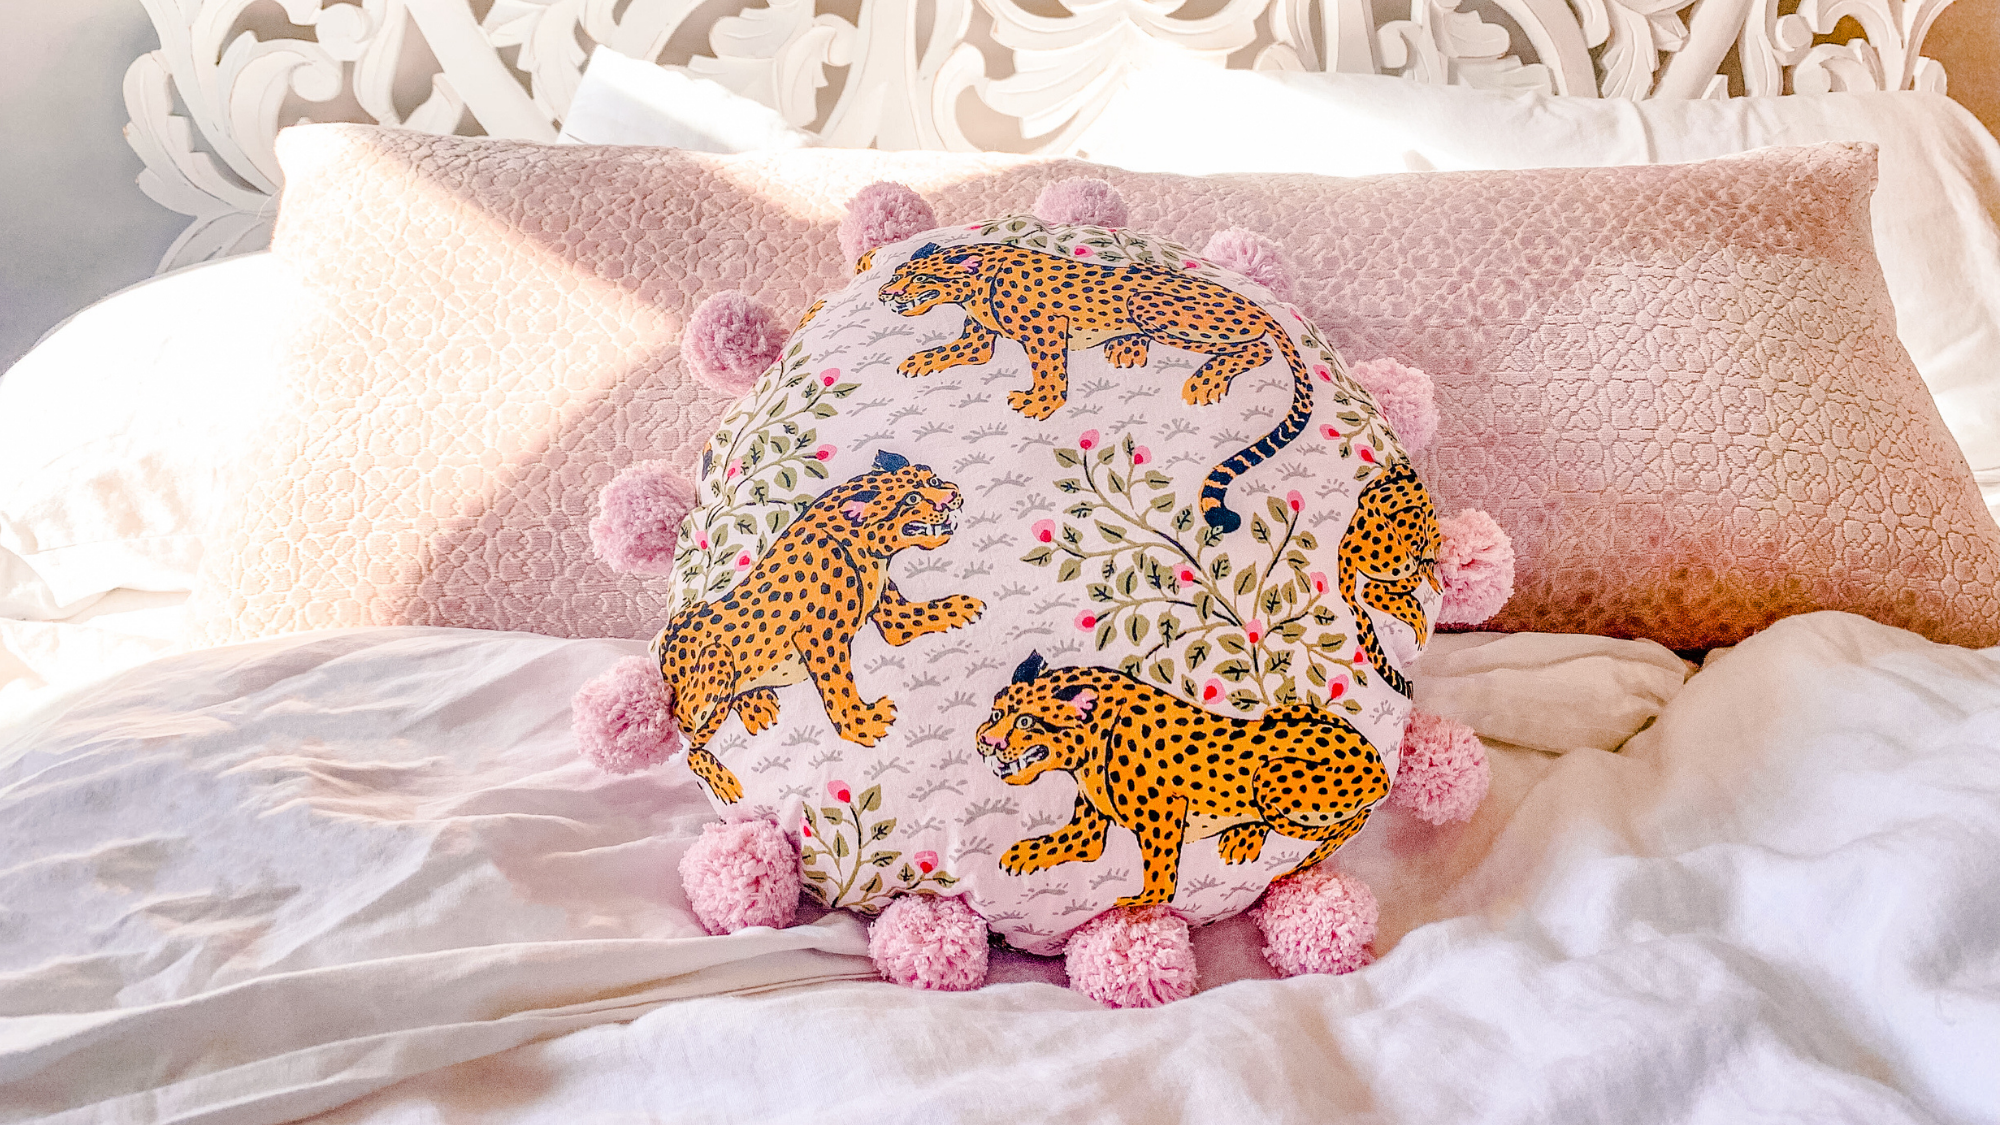
How do you combine sustainability, creativity and a sense of fulfillment during cold winter months!? A DIY pillow project is a great way of giving fabrics or old clothing a second life and is the perfect way to carve out some creative time. To make it extra easy, most of the materials you’ll need for this project you likely already have in your home.
By Amy Voloshin
February 2022
Weekend Project: DIY Throw Pillows

Ever since I was a child I’ve collected vintage fabric. Growing up, my parents were very into antiquing and one of my fondest memories is of amusing myself by digging through vintage textiles while they shopped for more serious furniture pieces.

As you can probably imagine, this means I’ve grown a surplus of beautiful fabric scraps. In order to put these to good use, and show off my older fabrics, I like to repurpose them into throw pillows that I can use to add color and texture around the house.

Create your own throw pillow using fabric scraps

What you’ll need: 

• Scrap fabric (You can turn one of our Printfresh totes into your pillow if you’d like or read our interview with Stacy Jackson for some pro tips for sourcing secondhand fabric if you don’t already have some.)
• Sewing machine (For a smaller pillow you could sew the entire pillow by hand if you don’t have a sewing machine.)
• Needle and thread
• Straight pins
• Fabric Scissors
• Poly-fil or similar polyester fiber fill (You can also try using one of these more eco-friendly alternatives.)
• Pencil
• Large plate
• Pom Pom maker (optional)


What you’ll do: 

1. Start by stacking 2 pieces of fabric together, with the right sides facing in. (The "right side" of the fabric is the front or patterned side of the fabric. Conversely, the "wrong side" is the back or blank side of a piece of fabric.) 

2. Make sure that the edges of the fabric are lined up. 

3. Using your dinner plate as a guide, take your pencil and trace a circle onto the stacked fabric. (Tip: The circle needs to be 1”-2” larger than the size you want your finished pillow to be.)

4. Pin your fabric together just inside the circle. 

5. Cut out your circle without removing the pins. They will help hold the fabric together while you sew.he fabric together while you sew.

6. Sew around the circle using a thread color that matches your fabric until you have a 4-6 inch gap left. (This is where you’ll turn the pillow right side out)  You can remove the pins as you sew. 

7. Turn the fabric right side out.

8. Stuff the pillow with polyester fiber fill. How much fiber fill you use is up to you. The more you stuff it, the fluffier the pillow will be.

9. Stitch the gap shut by hand by folding the raw edges of the opening so that they match up with the seams. Knot the thread securely, and trim the excess off. You can remove the last pins when you are done.

Adding pom poms to your pillow

I love making pom poms to add to my pillow for a fun flair. They’re an easy way to introduce a coordinating color or add texture to the pillow. If you want to try making pom poms for your pillow you’ll need some yarn, a pom pom maker, and a pair of scissors. Don’t worry about buying a special tool that you won’t have much use for outside of this project, you can make your own using your fingers, a fork, or even a piece of cardboard. 

To make the pom poms:

1. Decide how large you want your pom poms to be. The size and placement around the pillow will determine how many pom poms you need to create. 

2. Using the appropriate size pom pom maker, follow the instructions to create your pom poms.

3. Trim your pom poms so that they are all perfectly round and symmetrical. Avoid trimming the piece of yarn you used to secure the pom pom together. Knot the ends together several times - you will use this knot to attach the pom poms to the pillow.

4. Mark the placement of your pom poms on your pillow using your pencil. You may want to measure to ensure that they’re evenly spaced. 

5. Take your needle and thread and sew your pom poms onto your pillow. (Tip: Slip the needle through the knots on each pom pom. Repeat to attach pom poms around the entire pillow. Trim any long yarn pieces that remain. )

Step back and admire your completed pillow! 

I love to take time for creative hobbies. I’ll stay in my pajamas (Printfresh of course) and curl up to work for 30-60 minutes (that's usually about as long as I get before the kids want to join in or I need to move on to something else).

If you make this pillow take a photo of your finished product and tag us on Instagram. We love to see how you do these DIY projects.

comments comments

PF MAG: Founder Amy Voloshin is passionate about creating a space that speaks to our brand, shares unique perspectives from pattern enthusiasts and finds ways to promote more sustainable living. Our blog PF Mag covers creative topics on all things lifestyle - including behind the scenes looks, fashion, design, travel, and home decor, as well as interviews with some of the people who inspire us most. 

JOIN OUR COMMUNITY

Stay inspired with thoughtful interviews, design and DIY ideas, recipes, shopping tips, and so much more.


Bagheera
Bagheera - Long PJ Set - Hot Pink - Printfresh
Personalize It
Bagheera - Ready to Ruffle Dress - Ink - Printfresh
Holly Jolly Bagheera - Lightweight Flannel Long PJ Set - Ruby - Printfresh
Flannel
Bagheera - Satin Wildest Dreams Set - Tobacco - Printfresh